|
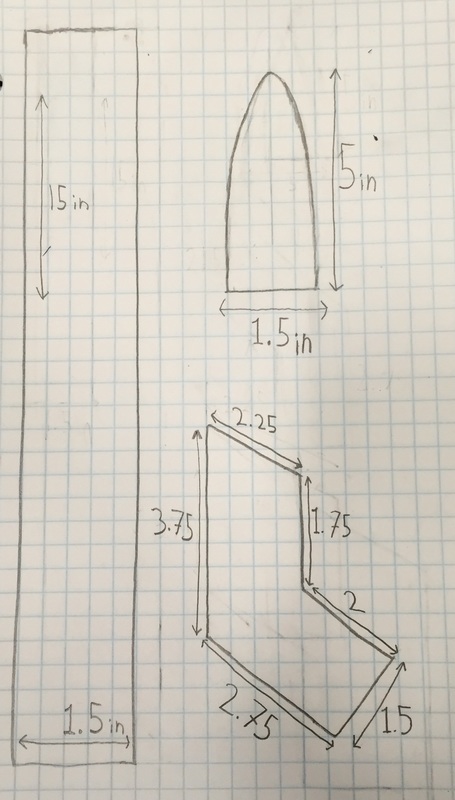
In order to have a visual representation of what we wanted our rocket to look like, we drew it out. After our drawing was finished we started the actual construction of our rocket. Nose Cone: At first our plan was to construct a nose cone out of balsa wood, but then Andrew brought PVC caps that perfectly fit on our rocket. So instead of building a nose cone we got to use the cap, which definitely made life easier. It was also the perfect weight our rocket needed, so we didn't have to glue anything inside of it, which was an added bonus.
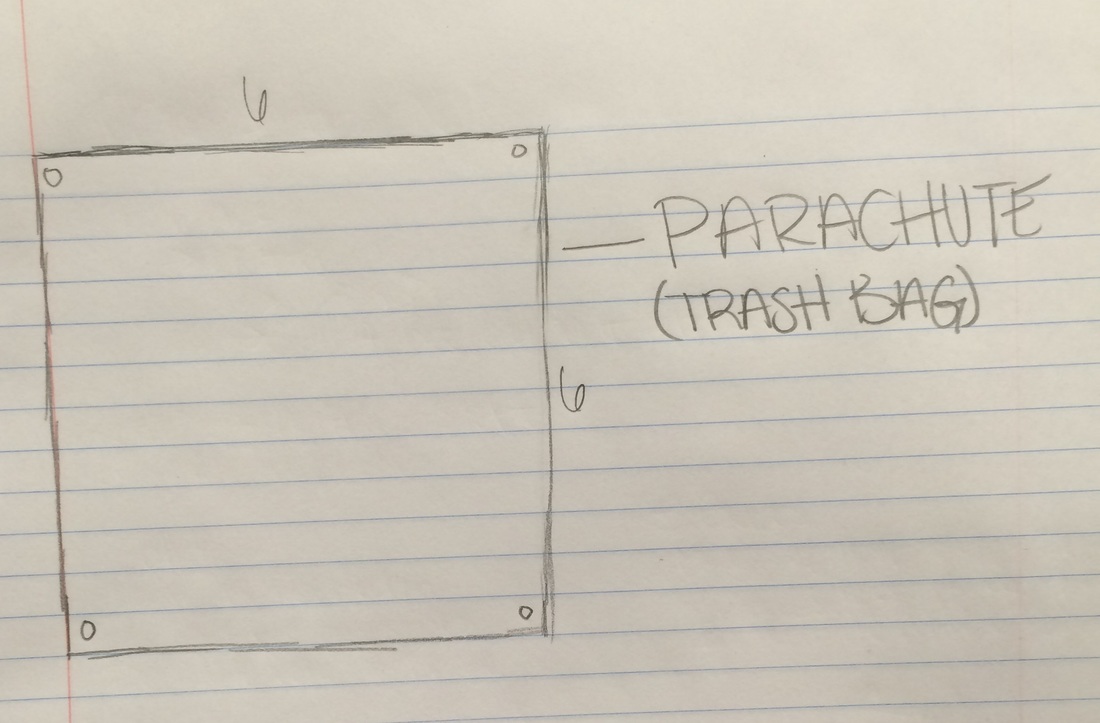
Body Tube: This was probably the hardest component to make, Gabe V. and Victor helped us with cutting out the strips and making sure it was the perfect length. They also taped down our very first layer, but after that Evan, Savreen, and I struggled a little bit. The hardest part was making sure the layers of paper where in their correct place and didn't slide off. Working with the wood glue got really messy, and by the end of this we were all covered in it. Our body tube turned out okay, we wanted to really glue down the seems, but it wasn't an even coat of glue, so our tube had quite a few bumps. We tried sanding the bumps down to make it even, but that really didn't do much. Before any of us started making our body tubes, Andrew did a demonstration in front of the entire class, and he without a doubt made it look a lot easier than it actually is. Our tube ended up being 12 inches, which was smaller than we originally wanted it to be, but it ended up being fine. Fins: The very first thing we had to do for our fins, was find the center or gravity and thrust. We found the center of gravity by tying a string to our rocket and spinning that around. There was a mock motor in our rocket to make sure the results were as accurate as possible. Once we found the center of gravity, we had our top and bottom, and the surface area had to be the same for both halves. Our fins ended up looking like the design on top, the surface area being 6.89 inches. The original plan of using four fins wasn't going to work because that meant the surface area on the bottom wouldn't be even to the surface area on the top. Luckily three fins would work perfectly, so that's how many we ended up using. Evan took the lead when making the fins, he got a piece of balsa wood, and drew the design of our fins on them. Then he took a pushpin and used that to push into the wood, then he got a razor cutter and pushed that into the wood. Before we glued the fins on we painted them along with our body tube. To make sure we glued the fins in the right place Phillippe showed us a picture online, we held our rocket up to that and drew the lines on our rocket. After the paint dried we used super glue, to make sure the fins would stay in place, then we used a small coat of wood glue on the edges. Parachute, Shock Cord, and Engine Housing: At first we wanted the parachute to be a square, but we made it in the shape of a circle, drawing it with a compass we made. We still made it out of a trash bag, and after we cut it out we put pieces of duct tape on four of the edges. Once that was done we used a hole puncher to make the four holes needed. After that we got fishing line that was cut in four even strips, and tied that in the holes. The duct tape was used to make sure when the rocket is launched the fishing line doesn't tear the trash bag. The fishing line was tied around shock cord, then the other end of the shock cord was super glued inside our rocket. This is so when our rocket launches, and our nose cone goes flying, the parachute will be deployed. For the engine housing, we didn't have to much, the size of our engine was perfect therefore it just slid right into our body tube. The only thing we needed for it was a metal clip, that came from a card stock folder, there was a small slit we cut into our body tube so the top part of our clip could be pushed in. If the top part of that clip was too long our motor wouldn't be able to fit in, so we made sure it was cut short enough, for our motor to fit.
0 Comments
Leave a Reply. |
AuthorWrite something about yourself. No need to be fancy, just an overview. Archives
December 2015
Categories |
 RSS Feed
